
What Is a Network Security Key? Let me tell you about the time I first encountered a network security key – and trust me, it wasn’t pretty! I was setting up Wi-Fi at my parents’ house, and they kept asking me why they needed this “complicated password thing” when they could just use their internet without one. After a good 20 minutes of explaining (and some deep breaths), I finally found a way to make it click for them.
Think of a network security key like the key to your front door. You wouldn’t leave your house wide open for anyone to walk in, right? Well, a network security key is exactly that – it’s basically a password that keeps your wireless network safe from uninvited digital guests. And boy, have I learned the importance of this the hard way!
What Is a Network Security Key? Breaking It Down
In its most basic form, a network security key is just a fancy term for your Wi-Fi password. But here’s the thing – it’s actually a bit more sophisticated than that. When you type in that password to connect to your Wi-Fi, what’s happening behind the scenes is pretty cool. The key works as an encryption code that scrambles all the data flowing between your device and your router.
I remember when one of my students asked me, “Why can’t we just use simple passwords like ‘password123’?” (Spoiler alert: please don’t ever do this!) This led to a fantastic classroom discussion about digital security, and I now use this example constantly.
Types of Network Security Keys
Over my years of helping friends and family with their Wi-Fi setups, I’ve encountered all sorts of security types. Let me break them down for you:
- WEP (Wired Equivalent Privacy):
Think of this as the great-grandfather of Wi-Fi security – old, well-meaning, but honestly pretty weak by today’s standards. If you’re still using WEP, it’s like leaving your house key under the doormat – everyone knows to look there! - WPA (Wi-Fi Protected Access):
This was a major upgrade from WEP, kind of like moving from a simple lock to a deadbolt. It’s better, but still not what you want to be using in 2024. - WPA2 (Wi-Fi Protected Access 2):
Now we’re talking! This is currently the most common type of network security, and for good reason. It’s like having a high-security lock system with cameras – much more robust! - WPA3 (Wi-Fi Protected Access 3):
This is the new kid on the block, and let me tell you, it’s impressive! Think of it as having a smart security system with biometric scanning. It’s the gold standard for network security right now.
Why It’s Super Important
Here’s a story that really drives this home: Last summer, I was helping a neighbor who had been experiencing mysteriously slow internet. Turns out, they had never changed their router’s default password (facepalm moment!). After some investigation, we discovered that half the neighborhood had been freeloading off their Wi-Fi! This is exactly why having a strong network security key matters.
A good network security key does three crucial things:
- Prevents unauthorized access to your network (bye-bye, freeloading neighbors!)
- Protects your personal information when you’re online
- Keeps your connected devices safe from potential attacks
Fun fact that blew my students’ minds: Every time you make a simple online purchase, your network security key is working behind the scenes to protect your credit card information. It’s like having an invisible bodyguard for your data!
Remember folks, your network security key is your first line of defense in the digital world. And trust me, as someone who’s dealt with the aftermath of weak Wi-Fi security, you don’t want to learn this lesson the hard way!
How to Find Your Network Security Key
Oh boy, do I have a story about this one! Last Christmas, my entire family gathering came to a screeching halt because no one could find the Wi-Fi password. A dozen people were there, crawling around and looking at the bottom of the router. My aunt insisted she had it written down “somewhere safe.” Spoiler alert: it was on a sticky note inside her kitchen cabinet. It’s not exactly Fort Knox-level security, but I’ll get to that later!
Checking Your Router First
The easiest place to start your search is right on your router itself. I always tell my students this is like finding the answer key in the back of the textbook – it’s right there if you know where to look! Most routers have a sticker somewhere on them (usually the bottom or back) with two important pieces of information:
- The default network name (SSID)
- The default network security key (sometimes labeled as “Network Key,” “WiFi Password,” or “WPA Key”)
Pro tip: Take a photo of this sticker with your phone right now. Trust me, in the future, you will thank past you for this little bit of preparation!
Finding the Key on Windows
Let me walk you through this – I’ve probably done this hundreds of times helping friends and family. Here’s your step-by-step guide:
- Right-click on the Wi-Fi icon in your taskbar (it’s that little fan-looking thing)
- Click on “Network and Internet Settings”
- Select “Network and Sharing Center”
- Click on your Wi-Fi network name
- Hit the “Wireless Properties” button
- Go to the “Security” tab
- Click “Show characters”
Boom! There’s your network security key. I remember the first time I showed this to one of my colleagues – their mind was blown. “You mean it was there the whole time?” Yes, yes it was!
Finding the Key on macOS
For all you Mac users out there (and I became one after years of being a Windows-only person), here’s how you find your network security key:
- Click the Apple menu
- Go to “System Preferences”
- Click on “Network”
- Select “Wi-Fi”
- Click “Advanced”
- Go to the “Wi-Fi” tab
Here’s where you’ll find a list of all your saved networks. Unfortunately, Apple doesn’t make it quite as easy as Windows to see the actual password – they’re kind of like that friend who never shares their secret recipe! You’ll need to:
- Find your network in the list
- Open “Keychain Access”
- Search for your network name
- Check the box for “Show password”
Mobile Device Methods
Now, finding your network key on your phone is a bit different, and honestly, this saved my bacon once when I was helping set up a smart TV and couldn’t access the router.
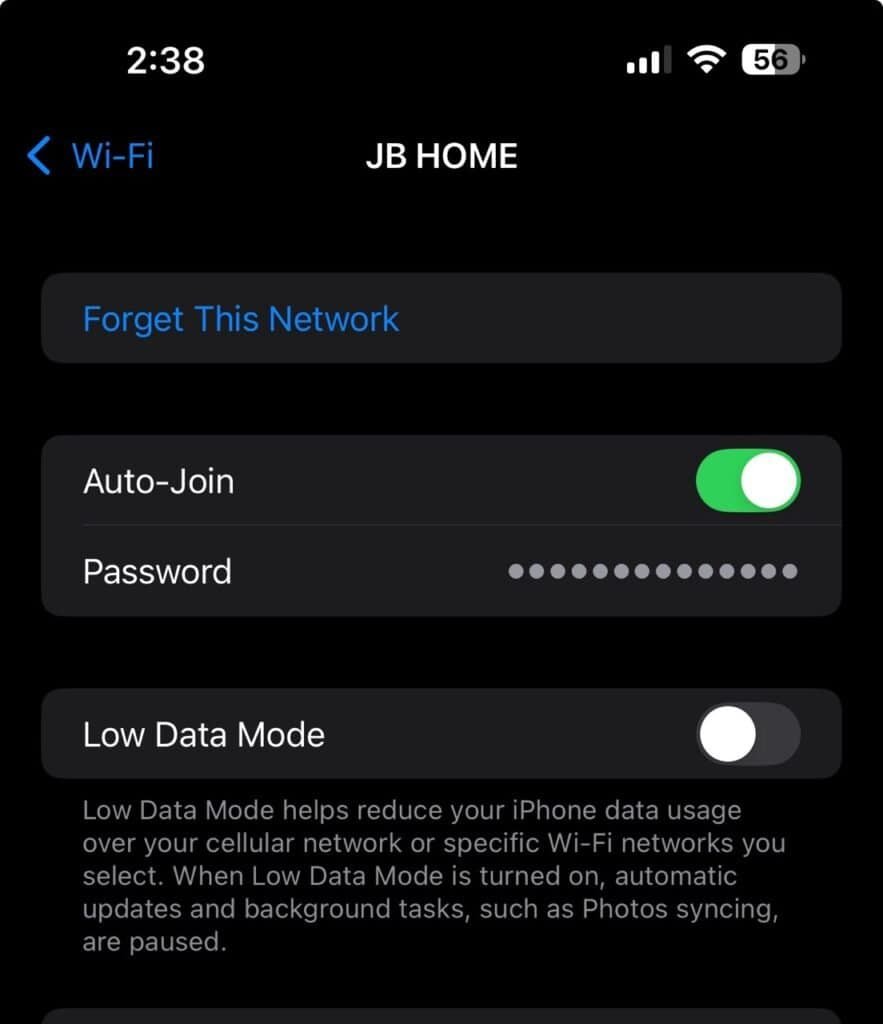
For iPhone:
- Go to Settings
- Tap Wi-Fi
- Tap the info icon (that little ‘i’ in a circle) next to your network
- If you’re running iOS 16 or later, you can actually see your password right there!
For Android (though it varies by manufacturer – ask me how I learned that the hard way):
- Go to Settings
- Select Connections or Network & Internet
- Tap Wi-Fi
- Select your current network
- Look for the Share or QR code option
Here’s a cool trick I discovered: On newer phones, you can actually generate a QR code that others can scan to connect to your network. No more shouting complicated passwords across the room!
When All Else Fails
Sometimes, despite our best efforts, we just can’t find that security key anywhere. Don’t panic! (I say this, but I definitely panicked the first time it happened to me.) You’ve got options:
- Check your router’s default settings – sometimes a reset will take it back to the original password
- Log into your router’s admin panel (usually by typing 192.168.1.1 or 192.168.0.1 in your browser)
- Contact your internet service provider – they’re like your backup backup plan
Remember: If you do end up resetting your router, you’ll need to reconnect ALL your devices. And let me tell you, nothing makes you realize how many smart devices you have until you have to reconnect every single one of them!
Types of Network Security Keys and Which Is Best
Let me tell you about my biggest Wi-Fi security facepalm moment. Back in my early tech days, I was proudly using WEP encryption because “hey, at least I had some security, right?” Wrong! I learned this lesson the hard way when a neighbor’s kid – a 14-year-old budding programmer – showed me how he could crack my network in under 5 minutes. Talk about a humbling experience!
The Evolution of Wi-Fi Security
Think of network security like the evolution of car safety features. Just as we’ve moved from basic seatbelts to advanced airbag systems, Wi-Fi security has come a long way. Let’s break down each type:
WEP (Wired Equivalent Privacy)
Oh, WEP. It’s like that flip phone from 2005 that you might still have in a drawer somewhere – it worked back then, but it’s hilariously outdated now. Created in 1999, WEP was the first attempt at securing wireless networks. But here’s the thing – it uses a 64-bit or 128-bit encryption key that’s, well, about as secure as a paper lock.
Fun fact: I once demonstrated to my class how quickly a WEP network could be compromised (in a controlled, educational environment, of course). It took less time than making microwave popcorn! If you’re still using WEP, please – and I cannot stress this enough – upgrade immediately!
WPA (Wi-Fi Protected Access)
When WPA came along, it was like upgrading from that flip phone to a first-generation smartphone. Better? Absolutely. Perfect? Not quite. WPA was basically a band-aid solution after everyone realized how vulnerable WEP was.
Key features of WPA:
- Uses TKIP (Temporal Key Integrity Protocol)
- Stronger encryption than WEP
- Dynamic key generation
- Still not secure enough for today’s standards
I remember being so excited about upgrading to WPA, only to learn a few years later that it too had significant vulnerabilities. It’s like buying a smartphone right before the new model comes out – sometimes timing isn’t on your side!
WPA2 (Wi-Fi Protected Access 2)
Now we’re talking! WPA2 is like having a modern smartphone with all the bells and whistles. Released in 2004, it’s still widely used today because it’s really good at what it does. The main improvement? It uses AES (Advanced Encryption Standard) – the same encryption standard used by the U.S. government for top-secret information!
WPA2 features that make it solid:
- AES encryption (much stronger than TKIP)
- Better key generation system
- More robust authentication process
- Protection against most common types of attacks
Here’s a pro tip I learned after years of setting up networks: When configuring WPA2, always use WPA2-PSK (AES) if it’s available. Some routers offer a mixed mode with TKIP, but trust me, you want pure AES for the best security.
WPA3 (Wi-Fi Protected Access 3)
This is the new hotness in Wi-Fi security, and let me tell you, it’s impressive! Think of WPA3 as the latest flagship smartphone with features you didn’t even know you needed. Released in 2018, it’s slowly becoming the new standard.
What makes WPA3 so special:
- Individualized data encryption (even on public networks!)
- Protection against brute-force attacks
- Better security even with weaker passwords
- Forward secrecy (if someone cracks your network later, they can’t read earlier data)
I recently upgraded my home network to WPA3, and while the setup was a bit tricky (some older devices needed updating), the peace of mind is totally worth it. It’s like having a security guard, a vault, and a high-tech alarm system all rolled into one!
Which One Should You Choose?
Look, I’m going to give it to you straight:
- If you’re using WEP: Drop everything and upgrade now. Seriously, right now.
- If you’re using WPA: You’re overdue for an upgrade to at least WPA2.
- If you’re using WPA2: You’re in good shape, but consider WPA3 if your devices support it.
- If you’re using WPA3: Virtual high-five! You’re rocking the latest and greatest.
Remember that one time I mentioned my neighbor’s kid cracking my WEP network? Well, I recently invited him over (he’s in college now, studying cybersecurity) to try and crack my WPA3 network. Let’s just say he wasn’t successful, and I got to enjoy a small moment of victory!
Pro tip: When buying a new router, make sure it supports WPA3. Even if you don’t use it right away, it’s good to have the option. Trust me on this one – future you will appreciate having the latest security standards available!
How to Change Your Network Security Key
You know what inspired me to write this section? The day I discovered my Wi-Fi network name was still “FBI Surveillance Van 2” – a joke my tech-savvy cousin set up during a family visit. While it gave the neighbors something to talk about, it taught me the importance of knowing how to change network settings myself!
Accessing Your Router Settings
First things first – you need to get into your router’s settings. This is like finding the control room of your home network, and honestly, it intimidated me the first few times. But don’t worry, I’ve got you covered!
Here’s your step-by-step guide:
- Find your router’s IP address
- On Windows: Open Command Prompt and type “ipconfig” – look for “Default Gateway”
- On Mac: Open Terminal and type “netstat -nr | grep default”
- Most common addresses are 192.168.0.1 or 192.168.1.1
- Log into your router
- Open your web browser and type in that IP address
- Enter your admin username and password
- Can’t remember them? Check the router’s sticker! (I keep finding these in the oddest places – once found one behind a plant pot!)
Pro tip: If you’ve never changed your router’s admin password from the default, do that first! It’s like leaving your spare key under the welcome mat – everyone knows to look there.
Creating a Strong Network Security Key
Now, let me share a story that’ll make you cringe. I once helped a friend set up their Wi-Fi, and their password was “password123” because it was “easy to remember.” Yikes! Here’s how to create a password that’s both secure and manageable:
Strong Password Guidelines:
- At least 12 characters long (I go for 15+ because I’m paranoid like that)
- Mix of uppercase and lowercase letters
- Include numbers and special characters
- Avoid personal info (sorry, but your dog’s name + birth year isn’t secure!)
Here’s my favorite trick for creating memorable but secure passwords:
- Think of a sentence you’ll remember
- Take the first letter of each word
- Add numbers and special characters
- Mix up the case
Example: “I love eating pizza on Friday nights!” becomes “Il3p!oFn2024”
Step-by-Step Password Change Process
- Find the wireless settings in your router’s admin panel (usually under “Wireless” or “Wi-Fi Settings”)
- Look for “Security” or “Password” settings
- Select WPA2 or WPA3 as your security type (trust me on this one)
- Enter your new password
- Save changes (and don’t panic when everyone gets disconnected!)
Important note: Write down your new password somewhere safe before saving changes. I learned this the hard way when I changed my password and immediately forgot it. Not my proudest moment!
Common Mistakes to Avoid
Let me share some face-palm moments I’ve either experienced or witnessed:
- The “I’ll Remember It” Trap
- Always document your new password
- Keep it somewhere secure (not on a sticky note on your monitor!)
- Consider using a password manager
- The “Quick Fix” Error
- Don’t use simple passwords just because they’re easy
- Avoid patterns like “qwerty” or “12345”
- Never use the same password as your banking or email
- The “Share with Everyone” Mistake
- Create a separate guest network if possible
- Change your password periodically, especially after contractors or visitors have used it
- Don’t broadcast your password on social media (yes, I’ve seen this happen!)
After Changing Your Password
Here’s what nobody tells you about changing your Wi-Fi password – it affects EVERYTHING connected to your network. And I mean everything:
- Smartphones and tablets
- Smart TVs and streaming devices
- Security cameras and doorbells
- Smart home devices (thermostats, lights, etc.)
- Game consoles
- Smart appliances
Pro tip: Make a list of all your connected devices before changing the password. Trust me, you don’t want to realize at 11 PM that your smart coffee maker won’t work for tomorrow morning’s brew!
Managing Your New Password
Remember my sticky note behind the plant pot story? Let’s do better than that! Here are some secure ways to store your network information:
- Password Manager (my preferred method)
- Encrypted note on your phone
- Written in a secure location (not on the router!)
- Shared securely with family members
I’ve started keeping a “network journal” where I document all changes made to my router settings, including password changes. It’s saved me more times than I care to admit!
Troubleshooting Network Security Key Issues
Let me tell you about the time I spent two hours troubleshooting a network connection, only to realize I was typing a lowercase ‘l’ instead of the number ‘1’ in the password. Talk about a humbling experience! These are exactly the kinds of silly (but frustrating) issues I’ll help you avoid.
Common Connection Problems
First, let’s tackle the most frequent issues I’ve encountered both personally and while helping others:
The “Invalid Security Key” Message
This one’s a classic! Here’s what to check when you get this error:
- Caps Lock key (my most frequent troubleshooting save!)
- Similar-looking characters (0 vs O, 1 vs l, etc.)
- Hidden spaces at the beginning or end of the password
- Correct network selection (I once spent 15 minutes trying to connect to my neighbor’s similarly-named network – embarrassing!)
Pro tip: When entering your password, click the “show password” option if available. I can’t tell you how many times this simple step has saved me from pulling my hair out!
The “Connected but No Internet” Puzzle
Oh boy, this one’s frustrating! You’ve entered the correct password, you’re connected to the network, but still no internet. Here’s my troubleshooting sequence:
- Check if other devices are working
- Restart your device (yes, the old “turn it off and on again” really works!)
- Forget the network and reconnect
- Check your router’s settings
After spending countless hours trying more complicated solutions, I learned this sequence the hard way. Sometimes the simple fixes really are the best!
When You’ve Forgotten Your Password
We’ve all been there! Last summer, I came back from vacation and completely blanked on my Wi-Fi password. Here’s what you can do:
- Check Common Password Locations:
- Router sticker
- Password manager
- That “secure place” where you wrote it down
- Documents folder on your computer
- Find It on Already-Connected Devices:
- Windows PC (using the Network Settings method)
- Mac (using Keychain Access)
- Mobile devices (in Wi-Fi settings)
- Last Resort Options:
- Access router settings if you’re connected via ethernet
- Reset the router to factory settings (but be prepared to reconfigure everything!)
Router Reset: The Nuclear Option
Sometimes you just need to start fresh. Here’s what I wish someone had told me before my first router reset:
- Before Resetting:
- Document all your current settings
- Write down any port forwarding rules
- Note any special configurations
- Backup router settings if possible
- The Reset Process:
- Find the reset button (usually a tiny hole)
- Press and hold for 10-30 seconds
- Wait for the router to restart
- Default password will be on the router sticker
Pro tip: Take photos of your router’s current settings screens before resetting. Future you will be incredibly grateful for this reference!
When to Call Your ISP
Look, I’m all for DIY solutions, but sometimes you need to call in the pros. Contact your ISP when:
- Your router won’t reset properly
- You can’t access the router settings
- The connection drops frequently
- You see unusual network activity
I learned this lesson after spending an entire Saturday troubleshooting what turned out to be an ISP-side issue. Sometimes the fastest solution is just making that call!
Security Red Flags to Watch For
Over the years, I’ve developed a sixth sense for network security issues. Here are some warning signs:
- Unexpected devices on your network
- Slower than normal internet speeds
- Router settings that changed mysteriously
- Unfamiliar network names appearing
True story: I once noticed my network was sluggish and discovered someone had managed to connect an entire gaming setup to my network! That’s when I learned about MAC address filtering – another layer of security worth considering.
Preventive Measures
Here’s what I do now to avoid future headaches:
- Keep a secure network diary with:
- Current password
- Security type (WPA2/WPA3)
- Date of last password change
- List of authorized devices
- Regular maintenance:
- Change password every 3-6 months
- Update router firmware
- Review connected devices
- Check security settings
Remember: Good network security is like flossing – a little prevention goes a long way in avoiding bigger problems later!